
Band Data Functions
Writing a library for Band Data purposes wasn't my first idea . While I am writing the Arduino Flex Controller code I realized that I could share the basic part of my code for Band Data usage. I
read a lot of posts on FlexRadio Community from people asking for a particular kind of Band Data system like I2C, BCD, RS-232 and so on. This library really doesn't implements any of them, but
give you a very simple way to do it. There is also the CAT-RS232 Library that implements a
very basic set of CAT commands
Let's see how.
Overview
Arduino DUE/MEGA has a lot of pins you can use out of the box, to drive relays, motors, servos, and so on. Also, DUE has natively support for I2C, SPI and RS232 protocols and this
give us the opportunity to integrate a Flex Rig with existent hardware like Antennas, amplifiers, antenna switchs and so on.
The library generates events you can simply handle from your sketches. You don't need to worry about basic rig communication, nor you are requested to handle all your logic in the main
loop() routine.
In the example directory you'll find an configured project (FlexSignature.ino). Just open it with the Arduino Ide and start coding all the events you need. In the project you can find a specific file for each Flex Object:
- G06_RadioEvents.ino
- G07_EqEvents.ino
- G08_InterlockEvents.ino
- G09_TransmitEvents.ino
- G10_PanadapterEvents.ino
- G11_WaterfallEvents.ino
- G12_SliceEvents.ino
EVENT HANDLING
To handle an event you need to identify the property you need (the Object-Properties table is shown in the Flex Library web page) and then edit the proper file.
For example if you want to be notified of each Transmit Frequency change you have to:
- open the G09_TransmitEvents.ino (object=Transmit - property=freq);
- uncomment the proper attach_<property>() statement (each attach method is in the configure<Object>Events() function);
in this example the correct statement is fRig.transmit.attach_freq_event(onTransmit_freq); - uncomment the related handler function on<Object>_<property>();
in this example the function is:
void onTransmit_freq() {
Serial.println("onTransmit_freq() event!");
} - implement your business code in the event handler.
If you want to be notified of each SliceFrequency change you have to:
- access the G12_SliceEvents.ino (object=Slice- property=RF_frequency);
- uncomment the proper attach_<property>() statement (each attach method is in the configure<Object>Events() function);
in this example the correct statement is fRig.slice[i].attach_RF_frequency_event(onSlice_RF_frequency);
- uncomment the related handler function on<Object>_<property>();
in this example the function is:
void onSlice_RF_frequency(const int senderId) {
Serial.print("onSlice_RF_frequency("); Serial.print(senderId); Serial.println(") event!");
}
Note that each Slice, Waterfall and Panadapter event handler has a parameter, called "senderId" you can use to find the object that fired the event.
For example, a senderId=0 means that the RF_Frequency event has been fired from the Slice A, while a senderId=1 means that the RF_Frequency event has been fired from the Slice B.
- implement your business code in the event handler.
After having registered your event handler, the library execute a call to it, each time that particular event occurs. In the handler routine you can activate your hardware or you can use strategies to monitor your system.
If it is not enought you can have access to each Flex object properties and you can extend the library code to handle events based on other object properties. All these properties are shown in
the Flex Library web page.
SETTER METHODS - How to interact with the Rig
If you want to interact with the rig, you need to send commands to it. You can avoid to deal with underlying Ethernet API using one of the provided "setter" methods. (Anyway a good knoweldge of
the FlexRig APIs is alsways required).
To do it you only need an instance of the FlexRig object (fRig in the example project) and then invoke one of the methods listed below.
void set_headphone_gain(int val);
void set_sidetone_onoff(int value);
void set_breakin_onoff(int value);
void set_iambic_onoff(int value);
void set_vox_onoff(int value);
void set_dexp_onoff(int value);
void set_proc_onoff(int value);
void set_monitor_onoff(int value);
void setRxAntenna(int sliceId, String value);
void setTxAntenna(int sliceId, String value);
void setPreampGain(int panId, int value);
void setTxEqMode(int value);
void setRxEqMode(int value);
void setBand(int panId,int value);
void setMode(int sliceId,String value);
void setTx(int sliceId,int active);
void setActiveSlice(int sliceId,int active);
void removeSlice(int sliceId);
void createSlice(float freq,String antenna,String mode);
void setFreq(int sliceId, int freq);
void setAgcMode(int sliceId, String value);
void setDisplayPanWeightAverage(int panId,int value);
void setPanafallAutoBlack(int panFallId,int value);
void setNr(int sliceId,int active);
void setNb(int sliceId,int active);
void setApf(int sliceId,int active);
void setAnf(int sliceId,int active);
void setRit(int sliceId,int active);
void setXit(int sliceId,int active);
void setAudioMute(int sliceId,int active);
void setAgcOffLevel(int sliceId,int active);
void setAgcThreshold(int sliceId,int active);
void setLineoutMute(int active);
void setHeadphoneMute(int active);
void setBandWidth(int sliceId,int low,int high);
void setNbLevel(int sliceId,int value);
void setNrLevel(int sliceId,int value);
void setApfLevel(int sliceId,int value);
void setAnfLevel(int sliceId,int value);
void setPanAverage(int panId,int value);
void setRitFreq(int sliceId,int value);
void setXitFreq(int sliceId,int value);
void setPanFps(int panId,int value);
void setRxFiltLow(int sliceId,int value);
void setRxFiltShift(int sliceId,int value);
void setWatBlackLevel(int watId,int value);
void setRxFiltHigh(int sliceId,int value);
void setRxFiltWidth(int sliceId,int value);
void setWatGradientId(int watId,int value);
void setAudioGain(int sliceId,int value);
void setAudioPan(int sliceId,int value);
void setWatLineDuration(int watId,int value);
void setWatColorGain(int watId,int value);
void setCwSpeed(int value);
void setCwPitch(int value);
void setCwBreakinInDelay(int value);
void setCwMonitorGain(int value);
void setCwMonitorPan(int value);
void setMicLevel(int value);
void setSbMonitorGain(int value);
void setCompanderLevel(int value);
void setVoxLevel(int value);
void setVoxDelay(int value);
void setAmCarrier(int value);
void setTransmitLow(int value);
void setTransmitHigh(int value);
void setPanBandwidth(int panId,float value);
void setLineoutGain(int value);
void setHeadphoneGain(int value);
void setRfPower(int value);
void setTunePower(int value);
void setPanMinDbm(int panId,float value);
void setPanMaxDbm(int panId,float value);
void setPanCenter(int panId,float value);
void setEqControl(String type,String freq,int value);
void setMoxState(int value);
void setTuneState(int value);
SETTER METHODS - Examples
Some examples are listed below:
- if you need to enable the NB (Noise Blanker) filter on Slice B you can use:
fRig.setNb(1,1); //method signature is: void setNb(int sliceId,int active);
- if you need to set the RF_Frequency on Slice A you can use:
fRig.setFreq(0,14007000); //method signature is: void setFreq(int sliceId, int freq);
- if you need to set the main Lineout Gain you can use:
fRig.setLineoutGain(85); //method signature is: void setLineoutGain(int value);
Hardware you need
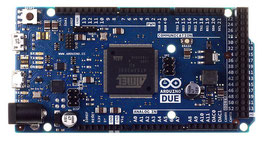
Arduino DUE

Ethernet Shield (W5100 Chip)
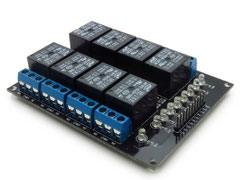
8 Channels 5V Relay Module, or similar
